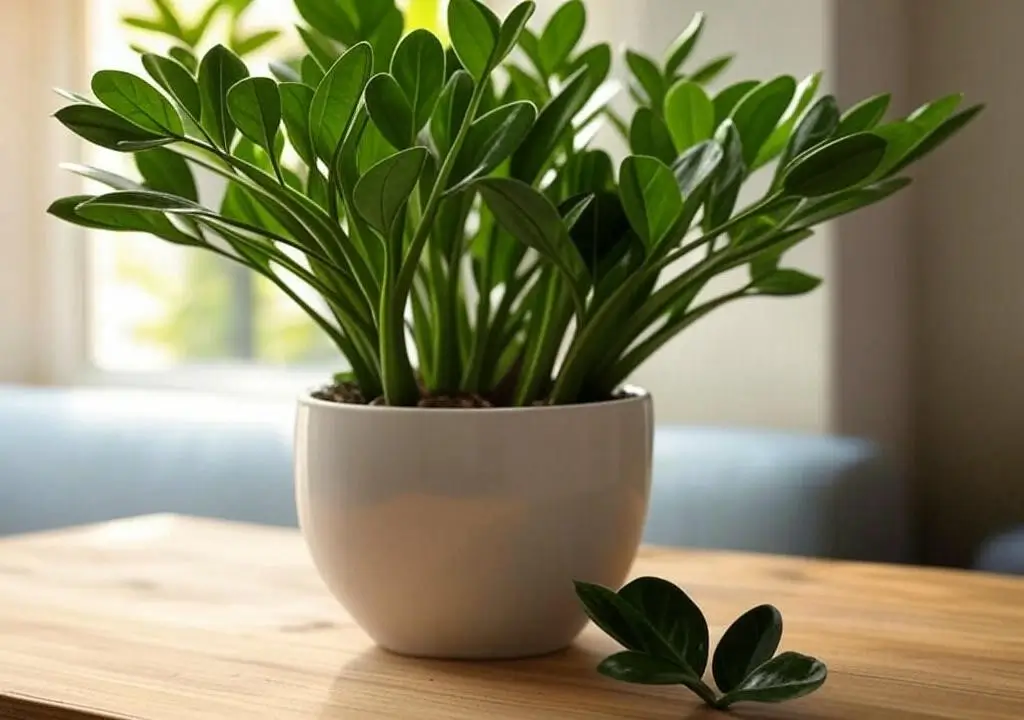
What if a single leaf could grow into a full-blown ZZ plant? The ZZ (Zamioculcas zamiifolia)—with its glossy, near-indestructible leaves, laughs off neglect and low light, making it a perfect houseplant.
I’ve tried propagating it from just one leaf, and it works. Slowly. Like, test-your-soul slowly.
Why propagate from leaves? It’s a fun and rewarding challenge, and you don’t need a large cutting to start. Plus, it’s a cheap, satisfying way to grow your ZZ stash without spending extra cash—if you can handle the wait.
This guide spills every step—water, soil, plus fixes for when things go sideways. No green thumb required. Ready to try it? Let’s break down if it’s even possible—and how to pull it off.
Can You Propagate ZZ Plant from a Single Leaf?
Yes, you can propagate a ZZ plant from a single leaf, but it’s not the fastest way. ZZ plants usually spread through rhizomes—thick, underground stems that store water and nutrients. Leaf propagation works too, though.
It just takes longer because the leaf has to form a tiny rhizome first, then roots, and finally a new shoot. Think months, not weeks.
The success rate isn’t perfect. I’ve had some leaves root beautifully and others just sit there, doing nothing. It’s about 50/50, depending on the leaf’s health and your setup.
Compared to splitting the plant (division) or using a stem cutting with multiple leaves, a single leaf is slower—sometimes 6 months or more before you see real growth. But if you’ve got time and a healthy leaf, it’s worth a shot. Let’s explore how to make it work.
Best Methods to Propagate ZZ Plant from Leaves
Propagation in Water vs. Soil (Comparison)
Propagating ZZ plant leaves can happen in water or soil—both work, but they’re different. Let’s break it down.
Water Propagation
Water propagation is great because you can see roots forming. It’s exciting to watch! It’s also clean and simple.
But it’s slower for ZZ plants, roots might take 6–8 weeks to show up and there’s a risk of rot if you don’t change the water often. I’ve lost a cutting to mushy rot before, and it’s a bummer.
Soil Propagation
Soil feels more natural for ZZ plants since they’re used to growing in dirt. It can encourage rhizomes faster (think 3–6 months), and there’s less chance of rotting if you don’t overwater.
The downside? You can’t see what’s happening underground, so you might wonder if it’s working.
Which is Faster for Root Growth?
Soil usually wins here. The leaf settles in and starts forming rhizomes sooner, while water cuttings can stall.
A study from Cornell University’s horticulture department backs this up—soil keeps moisture steady without drowning the cutting.
Still, water’s fine if you like watching the process. Pick what fits your style!
Step-by-Step Guide to Leaf Propagation in Water
Here’s how to grow ZZ plant leaves in water. Follow these steps:

Selecting the Right Leaf
Indoor ZZ plants need healthy leaves for propagation—pick a mature one.
Look for a glossy, dark green leaf with no yellow spots or tears. Baby leaves or damaged ones won’t cut it—they don’t have enough energy to root.
Preparing the Leaf Cutting
Grab a clean knife or scissors. Cut the leaf right where it meets the stem—nice and close. Then, let it sit out for a few hours until the cut end dries out.
This “callusing” step stops rot later. I usually leave mine on a paper towel overnight.
Placing in Water
Fill a clear glass or jar with distilled or filtered water—no tap water chlorine. Dip just the base of the leaf in—about a quarter inch.
If the whole leaf sinks, it’ll rot fast. I use a small shot glass to keep it simple.
Caring for the Cutting
Change the water every 4–5 days to keep bacteria away. Place the glass in bright, indirect light—like near a window but not in the sun. Roots take at least 6–8 weeks to appear, so don’t rush it.
I check mine weekly, topping off the water if it’s low
When to Transfer to Soil
Look for tiny white roots about an inch long—that’s your sign! You might see a little bump (a rhizome) too. Gently move the cutting to a pot with well-draining soil. Press it in lightly, water it once, and let it settle.
Step-by-Step Guide to Leaf Propagation in Soil
Prefer soil? Here’s how to propagate ZZ leaves straight in dirt.
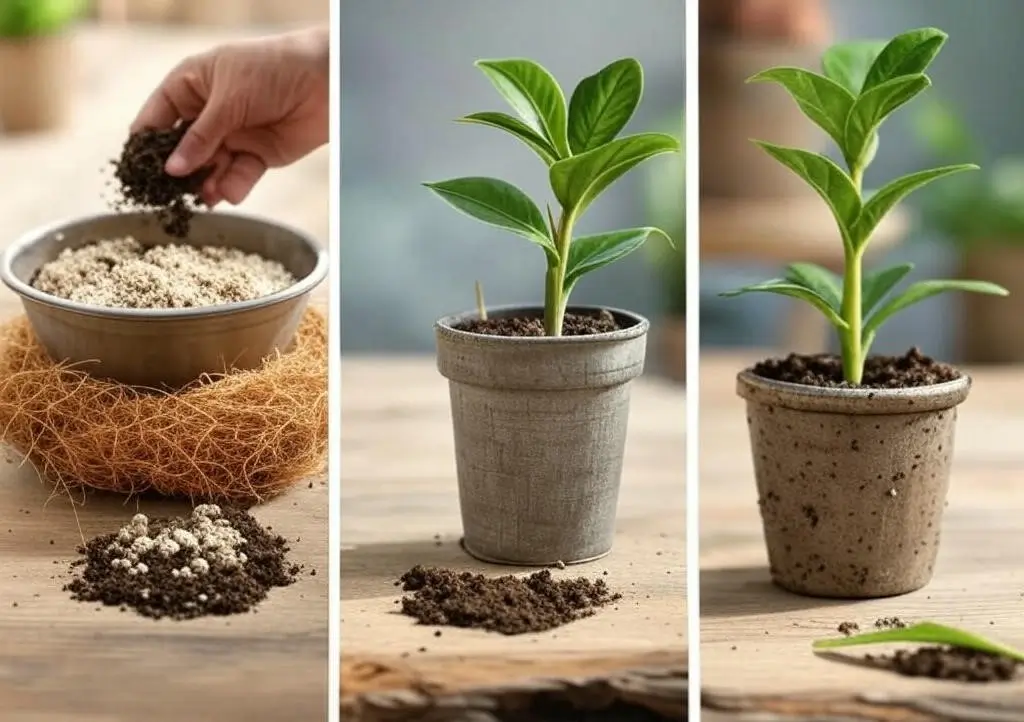
Choosing the Right Soil Mix
ZZ plants need well-draining soil to avoid rot. Mix equal parts potting soil, perlite, and coco coir—it’s light and airy.
I’ve used this combo, and it keeps the moisture just right without soaking the cutting.
Planting the Leaf Cutting
Stick the leaf’s base into the soil about half an inch deep. Keep it upright—prop it with a toothpick if it flops. Too deep, and it might rot; too shallow, and it won’t root. Firm the soil gently around it.
Watering and Care Tips
Water lightly—just enough to dampen the soil, not soak it. Overwatering is the enemy here; it turns your cutting to mush.
Check weekly, and only water again if the top feels dry. Place it in bright, indirect light, and wait.
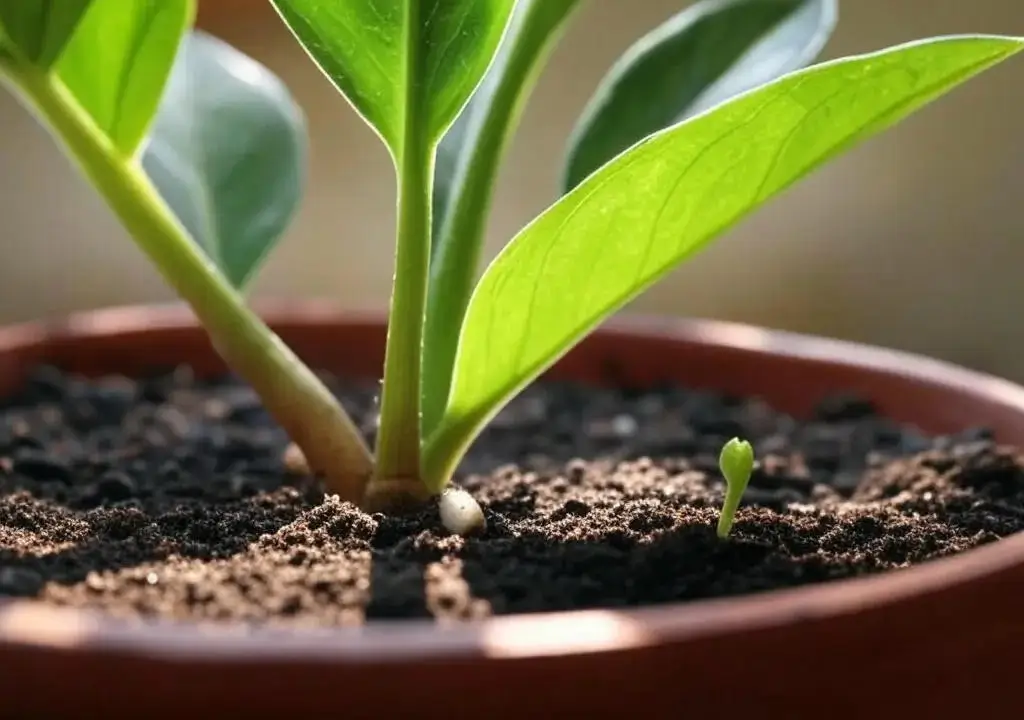
How Long Does It Take for ZZ Plant Leaves to Grow Roots?
Expect 3–6 months for rhizomes to form before roots kick in. Look for tiny bumps at the base—that’s the rhizome starting!
New shoots might pop up after that. It’s slow, but seeing those bumps feels like a win.
Signs of Successful Propagation
Success shows as small rhizomes or a new shoot poking out. If you tug gently and feel resistance, roots are there.
Patience pays off—I’ve had a leaf sprout after 5 months, and it was worth the wait.
Best Conditions for ZZ Plant Leaf Propagation
ZZ plant cuttings need the right setup to thrive. Here’s what works best.
Light
Bright, indirect light is perfect for ZZ propagation. Think a spot near a north-facing window or a few feet from a sunny one.
Direct sun burns the leaf fast—I learned that the hard way with a crispy cutting.
Temperature
Keep it between 65–75°F (18–24°C). Too cold, and the leaf stalls; too hot, and it dries out.
The University of Florida’s plant extension notes this range mimics the ZZ’s native African habitat, speeding up rooting.
Humidity
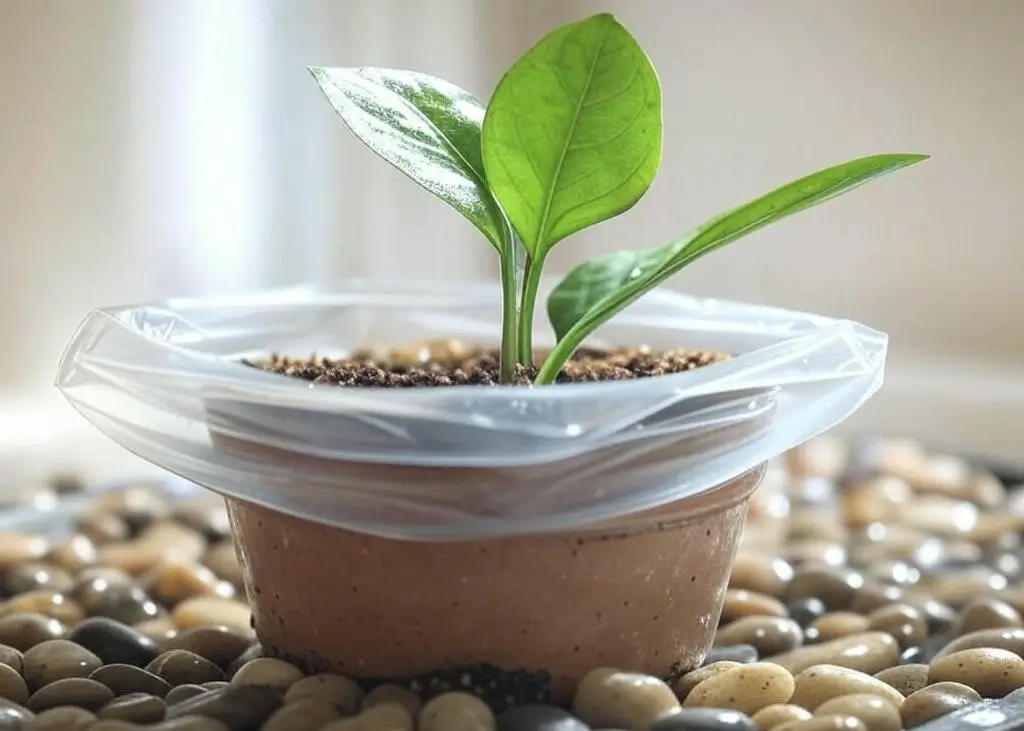
Moderate to high humidity helps roots grow faster. Aim for 50% or more—use a tray of pebbles with water nearby or mist the air (not the leaf).
In dry winters, I cover mine with a plastic bag, leaving a gap for air. It’s like a mini greenhouse!
These conditions tie everything together—light, warmth, and moisture work as a team. Get them right, and your ZZ cutting has a solid shot.
Common Problems & Solutions in ZZ Plant Propagation
Propagating ZZ plants isn’t always smooth sailing. Things can go wrong, but I have fixes for the most common issues. Let’s troubleshoot together.
Why Is My ZZ Plant Leaf Not Growing Roots?
ZZ plant leaves won’t root if something’s off. Here’s why it might happen:
- Unhealthy Leaves: A yellow or weak leaf doesn’t have the energy to grow roots. Always pick a strong one.
- Planted Too Deep: Burying the leaf too far in soil or water blocks air and stalls growth. Keep it shallow.
- Water Issues: Too much water rots it; too little dries it out. Aim for balance—damp soil or fresh water.
- Not Enough Light: Dim spots slow everything down. Move it to bright, indirect light.
I had a leaf sit in soil for months with no roots—turns out, it was in a dark corner. A quick move near a window fixed it.
Check these basics, and you’ll spot the problem fast.
Why Do ZZ Plant Leaves Rot in Water?
Rotting leaves in water are a bummer, but it’s fixable. Here’s what causes it:
- Stagnant Water: Old water breeds bacteria. Change it every 4–5 days—I mark my calendar to stay on track.
- Leaf Submerged Too Deep: Only the base should touch water. If the whole leaf’s underwater, it’s toast.
- Fungal Growth: Dirty jars or warm spots can grow gunk. Use clean glass and keep it cool.
Rot smells bad and turns the leaf mushy. If you catch it early, trim the soft part, dry the rest, and start over. Fresh water’s your best friend here.
How to Prevent ZZ Plant Cuttings from Drying Out?
Dry cuttings die fast, especially in winter. Here’s how to keep them happy:
- Boost Humidity: Mist the air (not the leaf) or set the pot on a tray of wet pebbles. Humidity around 50% works wonders.
- Plastic Bag Trick: Cover the cutting with a plastic bag, leaving a small gap for air. It traps moisture like a tiny tent. I’ve saved a drying leaf this way—it perked up in days.
- Check Watering: In soil, keep it slightly moist, not bone-dry. A quick finger test tells you when to add a splash.
Dry air’s the enemy, but these tricks fight it off. Your cutting will thank you with new growth.
Care After Propagation – When to Transplant & How to Maintain Growth
Your ZZ cutting’s rooted! Now it’s time to help it grow strong. Here’s how to care for it post-propagation.
When to Transplant ZZ Plant Cuttings
Transplant ZZ cuttings when they’re ready for a bigger pot. Look for these signs:
- Roots about 1–2 inches long (check water cuttings or feel resistance in soil).
- A small rhizome bump at the base—proof it’s growing.
- A new shoot popping up (bonus points!).
It’s usually 6–9 months after starting. Use a pot with drainage holes, and gently move the cutting in.
I transplanted one too early once, and the roots snapped—wait for those signs, and it’ll go smoother.
How to Transplant Without Damaging Roots
Fill the new pot halfway with soil mix (more on that next). Set the cutting in, roots down, and add soil around it. Don’t pack it tight—loose soil lets roots breathe. Water lightly, and place it back in bright, indirect light. Easy does it!
Best Soil Mix for Propagated ZZ Plants
Propagated ZZ plants need well-draining soil to avoid rot. Mix these:
- Potting Soil: A basic indoor mix as your base.
- Perlite: Adds air pockets—aim for 1/3 of the mix.
- Orchid Bark: Boosts drainage and mimics their natural setup.
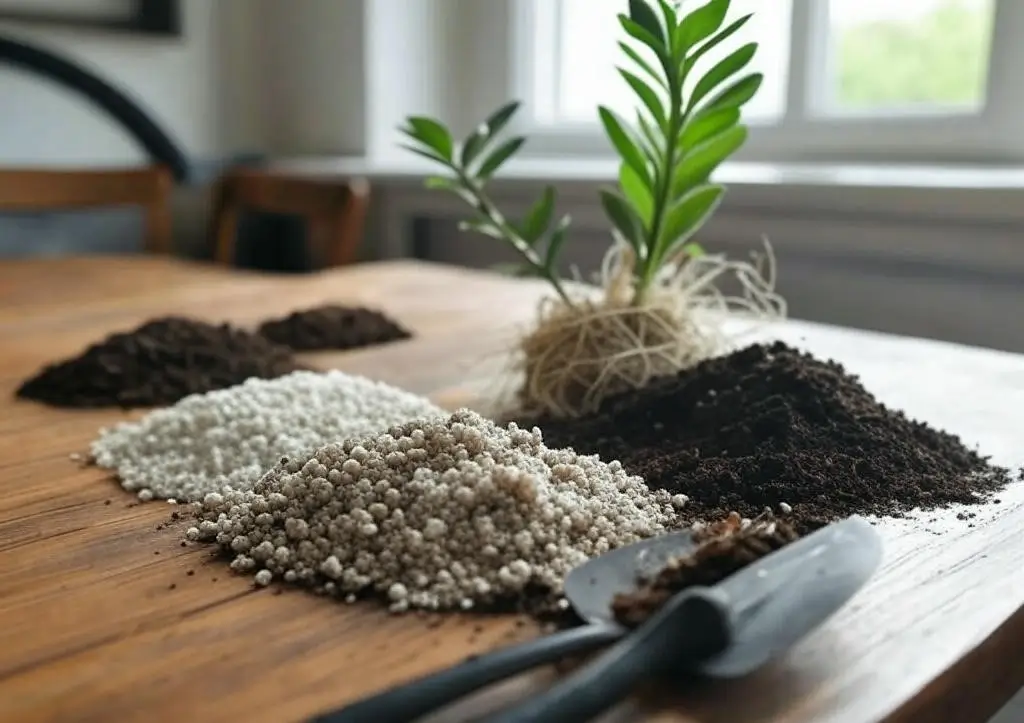
I use a 1:1:1 ratio, and it’s never failed me. The North Carolina State Extension recommends perlite for aeration in ZZ plants, keeping roots healthy. Wet, heavy soil’s a killer—stick to light and fluffy.
How to Speed Up ZZ Plant Root Growth
Want faster roots? Try these:
- Warm Temperatures: Keep it 65–75°F. A warm spot kickstarts growth.
- Bright Indirect Light: More light means more energy—just no direct sun.
- Rooting Hormone: Dip the leaf base in powder before planting. It’s optional, but it can shave weeks off.
Avoid overwatering—it slows things down and risks rot. I’ve used rooting hormone on one cutting, and it sprouted a month earlier than its twin. Warmth and light are free boosts, so use them!
FAQs About How to Propagate ZZ Plants
How Long Does It Take to Propagate a ZZ Plant?
Propagation timelines vary by method: expect roots in 6–8 weeks in water or 3–6 months in soil, with full growth (rhizomes and shoots) taking 6–9 months. Light, temperature, and patience play a big role!
Do I Need Rooting Hormone?
Rooting hormone isn’t required but can speed up the rooting process. It’s especially helpful for beginners.
Can I Propagate a ZZ Plant From a Stem Cutting?
Yes! Stem cuttings can also be propagated using similar methods, either in soil or water.
Conclusion
Propagating ZZ plants from leaves is a slow but rewarding journey. You can do it in water or soil—water lets you watch roots, while soil builds rhizomes faster. Pick a healthy leaf, give it bright light, warm air, and just-right moisture, and you’re set.
It might take 3–6 months for rhizomes, then more for roots and shoots, but that’s the deal with ZZ plants—they’re tough but take their time.
Expect hiccups like rot or slow rooting, but the fixes are simple: fresh water, good soil, and patience. Once it’s growing, transplant it carefully and watch it thrive. I’ve turned one leaf into a full pot over a year—it’s not quick, but it’s satisfying.
Stick with it, care for it right, and you’ll have a new ZZ to brag about. Happy propagating!